Home
Graphics
Creating A Table
This guide assumes you know basic HTML and CSS. Click here if you don't already
know how to do this or need a refresher How To Build a Basic Website.
Why Set Up a Table
First I must answer the question of why you would ever want to do this. A table can be useful
for a wide numeber of things such as saving statistics, a website layout in CSS, or most
usefuly to display data already on the server via SQL without having to login to actual
server to see this data. The later of which being perticuarly useful if you are running
a company and need some lower level employees to see this data, but don't want to give
them access to the actual server.
Setting Up The Table
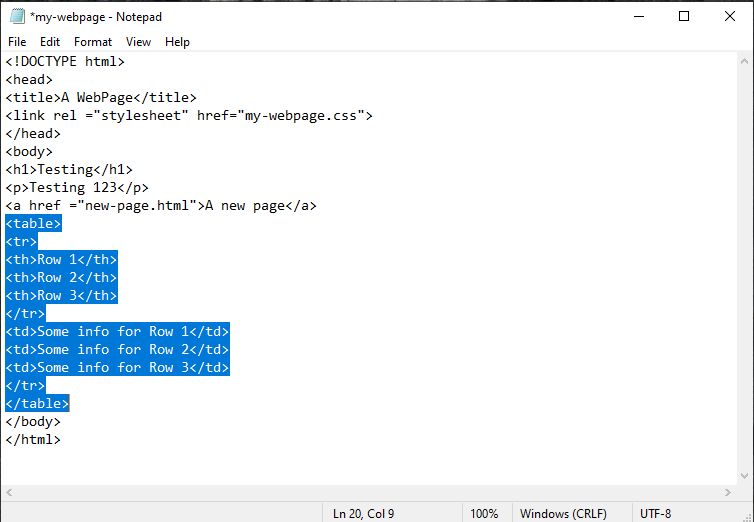
To get started type anywhere within the body < table > this will start the table.
To start a new row within the table type in < tr > for referense you can do the samething
outside or inside of the table by typing in < hr > both of which set a break in the page
horizontaly. Within the first row it is recommened that you use < th > before the text
as anything typed within < th > and < /th > will automatically be italicized without
needing to add any additional tags or CSS. With that being said you can setup as many
th tags you want and each one will represent a different statistic title.
Once you are satisfied with your titles it is time to actually send the data over.
Just note that this guide will not show you how to transfer SQL data over to the table
this is just covering how to create a basic html table. To begin type in < /tr > and < tr > below the last < th > you put in. Then type in < td > before the text. Unlike < th >
< td > will not automatically italicize any text typed in there so keep this in mind.
When setting up the < td > text remember this very well the order you type this text
in matters. Say you have three rows the first < td > will link to the first < th > or row
the second will link to the second < th > and the third to the third < th >. Same is true
with any conflicting CSS or other code as the one at the lowest part of the page will
almost allways win out as long as there are no errors in that code. To start the next row
just typ in < /tr > and < tr > below the last < td > you set up. Repeat this process for
as many rows you want. Don't forget to close the table when you are done and save.
Upon saving and loading the document on your browser of choice you may have
noticed that this table really does not look like a table at all and instead
looks more like an organised list. Let's fix this.
Getting The Table to Look More Like A Table
As we have done many times already go to the CSS document linked to the html
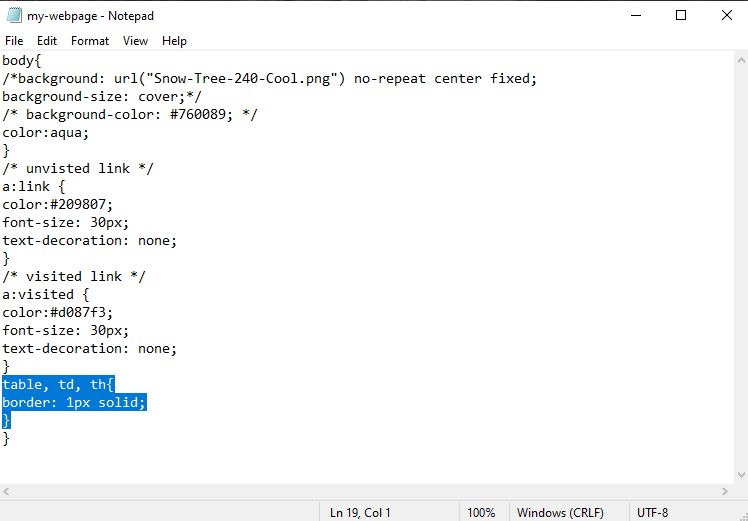
document. This time we will not be editing the body section but rather adding a new section.
First type in table, td, th { } it is very important to include all three of these variables
as if just one is excluded from the list then the table will be off. Of course you can
also set these up sepertly, but I don't recommend it here because one there is very
little reason to as all three variables will have the same traits and two this just clutters
up your css document and leaves more room for erorrs such as typos and what not. Next
within the table, td, th section type in border: 1px solid; this will ensure that a box
is drawn around the text making it look more like a table. Of course if want to
get more creative you can most certianly use a different color for the border.
For example if you want the border to be red just add the word red after solid or #ff000
after solid. The border concept isn't just restricted to tables either if you want to
do something similar with the p or h1 tags just use p { } or h1 { } in place of
table, td, th { } or if you want both p and h1 to have a border type in p, h1 { } and this
will work for pretty much any text tag yes even links can do this. Click here to learn how to
set one up Fun With LinksJust remember to include this
border in both the visted and unvisted versions of the link.
Closing Thoughts
A table can be a very good way to map out data in a more organised fashion.
Just remember that you also need to get your table to actually look like a table.
If you wish to learn more click this link to W3schools W3Schools
in the mean time I will soon teach more about web design.